Home networking is becoming more and more complex. There is an ever-increasing number of devices in a home that connect to the internet; tablets, smartphones, laptops, smart-TVs, game consoles, smart appliances. The list goes on and on.
Current areas that are impacting home networks:
Security, Monitoring & Automation: More and more sensors and other devices are becoming IP enabled and need network connectivity to function.
Video Streaming: Video is going IP. Netflix, YouTube, Hulu, HBO Max, Disney+ and Twitch are some of the largest consumers of internet bandwidth today and show no sign of slowing down.
Telecommuting and Corporate IT Requirements: Working from home is the future workplace. Especially during the COVID-19 pandemic, remote work has been crucial in continuing business operations. As more people work from home, more companies are requiring strict security measures for their employee’s home networks.
With all this technology at home, I was interested to see what kind of devices are communicating over my home network and figure out what they are up to. After a quick search I came across a blog post by Gary Fisk from Corelight that talked about how their sensor software is now available to run on a Raspberry Pi. The sensor gives you visibility of your home network traffic and can operate as a network detection and response tool. It helps you answer some questions such as: What kind of encryption do your devices use? How many devices are there on my network? Who’s reaching out to whom, and What services are in use? The title of the blog post is “Who’s your fridge talking to at night?” and you can find it here: https://corelight.blog/2020/11/19/corelight-at-home/. I found more details for the Corelight@Home project through Jonathan Singer’s post on Youtube. You can view it here: https://www.youtube.com/watch?v=tTV58n3fGeY.
I first attempted this project with stuff I had around the house, but quickly realized my Raspberry Pi 2 was not up to the challenge. After trying to install Corelight@Home, I received the rainbow screen of death upon reboot of the device. So, I decided to purchase some new components.
hardware for this project:
Raspberry Pi 4 - CanaKit Raspberry Pi 4 8GB Starter Kit - 8GB RAM https://www.amazon.com/gp/product/B08956GVXN/
TP-Link 5 Port Gigabit Managed Switch https://www.amazon.com/gp/product/B00N0OHEMA/
5 pack of Short Cat6 Ethernet Cable https://www.amazon.com/gp/product/B00E5I7T9I

The Cana Kit is a Raspberry PI kit that includes all the necessary items to get it up and running. Also, it is a fun little build project you can do with your kids. The managed switch will be used to allow port mirroring to use the Raspberry Pi as an IDS (Intrusion detection system). The mirroring of traffic allows you listen to all the replicated traffic on another port on the switch.
Project Steps
Step 1 – Account Setup
Step 2 - Raspberry Pi Setup
Step 3 - Corelight@Home Installation
Step 4 – Network Setup
Step 5 – Review the Data
Step 1: Account Setup
Corelight
The first step is to register and request an account with Corelight for the Corelight@Home program. Once you fill out the form, they will send you a confirmation email and your account Idaptive credentials. You can reach the form here: http://www3.corelight.com/corelight@home. Once you have your account information you can log into the Idaptive website here: https://corelight.my.idaptive.app/my. This is where you can download your Corelight license which you will need when installing Corelight@Home on the Raspberry Pi.
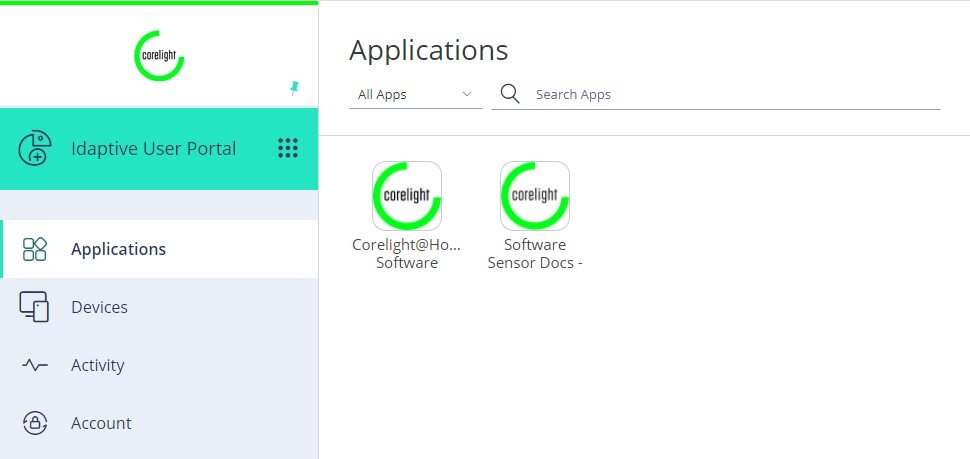
The Corelight Idaptive User Portal
Humio
The Corelight software sensor sniffs a monitoring interface and exports JSON formatted Zeek logs, Suricata logs, and/or extracted files locally or to a repository of your choice. For this project we will be using Humio as a repository. They are currently offering a 30-day free trial. Humio is a modern log management platform designed for today’s complex and distributed IT environments. An index-free architecture and streaming observability allows you to see what is happening in your environment -- in my case, it will be my home network -- in real time.
You can create an account with Humio here: https://www.humio.com/getting-started
After you have your account created in Humio, you will need to set things up to accept the Corelight data.
Step 1 - Create an API token.
Step 2 – Set up a dashboard.
Create a new API token
Create a new API token and make sure the Assigned Parser set it to “corelight-json”. Which you should save for later when you are installing the Corelight@Home.

Humio API Token
Dashboard
The next step is to set up a dashboard in Humio. If you go to the Market place you can install the “corelight/sensor “Humio dashboards.


List of available Corelight dashboards.
Step 2: Raspberry Pi Setup
Raspberry Pi Image
To install the Raspberry Pi OS on the Raspberry PI. you need to use the Raspberry Pi Imager. Raspberry Pi Imager is the quick and easy way to install Raspberry Pi OS and other operating systems to a microSD card, ready to use with your Raspberry Pi. You can download it here: https://www.raspberrypi.org/software/
Select the Raspberry Pi OS from the available options.
Select SD card you want to use to install the OS.
Then click the write button. The imager will wipe the memory card and install the Raspberry Pi OS. (Make sure you select the correct SD drive.)
One you receive the “Write Successful”, you can remove the SD and install it into the Raspberry Pi.


Additional system configurations on the Raspbery Pi:
Set up Wi-Fi.
SSH
Step 3: Corelight@home installation
After the OS is configured, you will install the Corelight software on the Raspberry Pi.
Steps to retrieve and install:
Wget to retrieve the installer file (A network utility to retrieve files from the internet):
sudo wget https://gkasten-open-bucket.s3.us-east-2.amazonaws.com/raspi/raspi-corelight -O /usr/bin/raspi-corelight
Chmod to set permissions:
sudo chmod 755 /usr/bin/raspi-corelight
Run the application:
raspi-corelight
Install process:
The first time this is run it will require a reboot.
It will ask you to proceed, click yes.
Add your credential to the adaptive portal.
It will ask to reboot again.
After reboot run
raspi-corelight
You will see the main menu.
Select quick config (qc).
Interface will be the ethernet port:
Eth0
Add the corelight license.
Just cut and paste it from the file you downloaded earlier.
Or add it in the etc folder. If you do this, you do not need to overwrite it.
Add your Humio API token.
Restart Corelight using the (r) command.
Everything should be up and running.

Wget and chmod command

Running the raspi-corelight command for the first time

Install updates
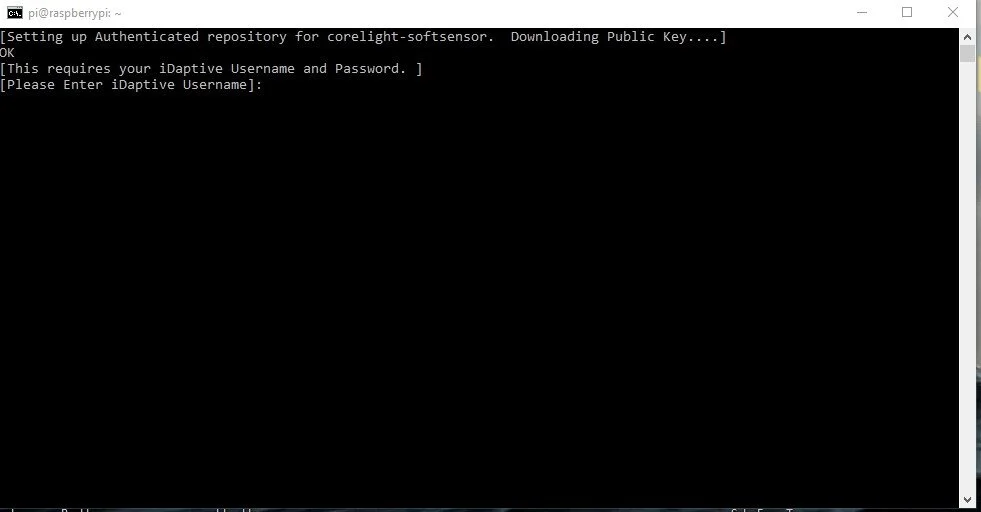
Add your iDaptive credentials

It will ask you to reboot

After reboot run the raspi-corelight command and the menu show. Then run the Quick Config (qc) to finish the setup.

Set up your interface in which Corelight will listen on. Enter “etho” which is the ethernet port on the Raspberry Pi. Then enter you Corelight license.

The next steps will be to enter your Humio API token, Humio URL and reenter your iDaptive username and password.
After the iDaptive username has been entered the application will restart and will bring you back to the main menu.
Step 4: Network Setup

Network Diagram
Intercept traffic from the modem and router.
Connect the two devices (Cable Modem and Router) in line with a smart switch.
Use port 5 for mirroring to the Raspbery Pi running the Corelight sensor.
Mirroring Setup on the switch

Select Monitoring and then Port Mirror in the navigation

Check the box to enable Port Mirror function and then select the Mirroring Port which in this case we will have the Raspberry Pi on Port 5 listening for traffic.

The two ports we will me monitoring are ports 1 and 2. I will have the cable modem on port 1 and the router on port 2. Then you can choose “Ingress”, “Egress” or “Ingress & Egress” mode to monitor the different directions of data transmission of Mirrored Port.
Step 5: Reviewing the Data
Once you have everything set up, data should be flowing from your Raspberry Pi and Humio. Now you can now log into your Humio portal and review the dashboard that was set up earlier.

Executive Dashboard
